

CapCut Desktop Review: Can It Handle Professional Editing?
Can CapCut Desktop handle professional video editing? Here is an honest review of its AI features, timeline performance, limitations, and paywall creep.
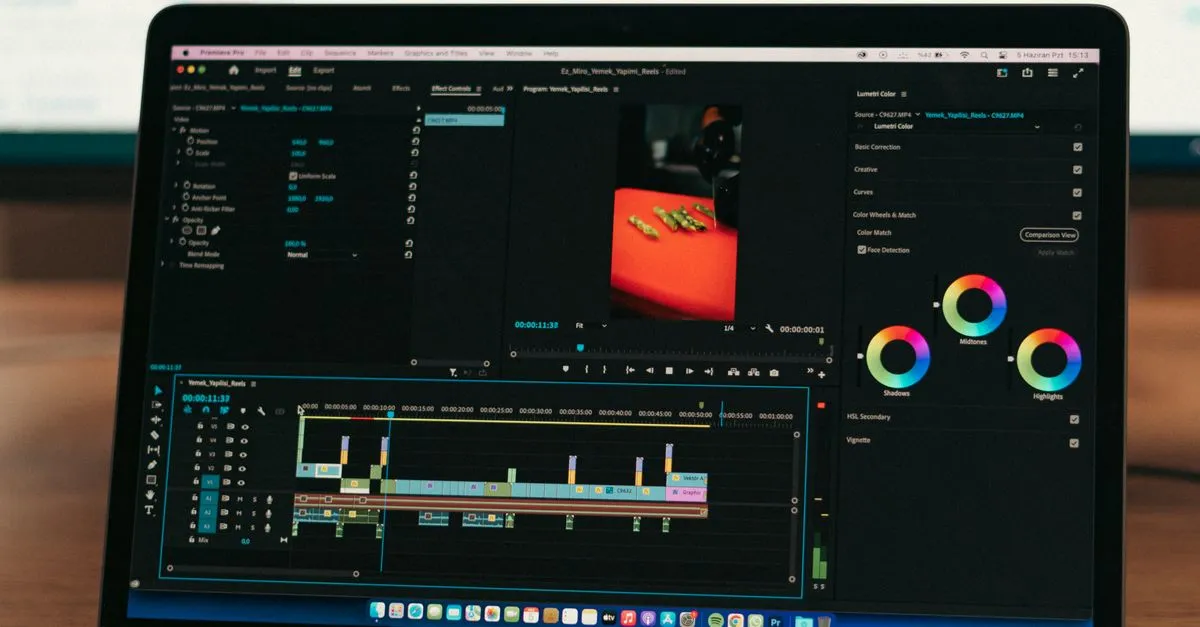
For years, the boundary line in video editing software was clearly defined. On one side stood the entry-level consumer tools: lightweight, simplified apps designed for quick cuts and home videos. On the other side stood the heavyweight non-linear editors (NLEs) like Adobe Premiere Pro, DaVinci Resolve, and Apple Final Cut Pro—complex, demanding environments built for multi-cam studio productions, detailed color grading, and precise keyframing.
Then came CapCut Desktop.
Originally built as a companion app for mobile short-form video creation, CapCut’s desktop version has evolved into something far more ambitious. Over the last year, I migrated a portion of my production pipeline away from DaVinci Resolve to test CapCut Desktop on actual commercial and high-end tutorial projects. The goal was simple: to see if this tool is a legitimate alternative for professional editors, or if it remains a glorified mobile app wrapped in a desktop interface.
Here is the unfiltered reality of working with CapCut Desktop in a professional capacity.
The Paradigm Shift: Speed Over Complexity
Traditional video editing software is notoriously slow to adapt to modern, high-velocity workflows. Setting up a project in DaVinci Resolve or Premiere Pro requires setting scratch disks, establishing database systems, importing media pools, manually creating proxy files, and routing audio channels before you even slice your first clip.
CapCut Desktop turns this model on its head by prioritizing “time-to-edit” above all else. The loop is just four steps—import your media, let it auto-transcribe, apply a preset or style, and export—and the whole thing takes minutes, not hours.
When you launch CapCut, the interface is clean and immediately understandable. The timeline uses a magnetic system similar to Final Cut Pro. If you drag a clip onto the main track, everything automatically snaps together. For editors accustomed to traditional track-based targeting where a misaligned track can overwrite downstream audio sync, CapCut’s magnetic timeline is incredibly liberating for rapid assembly.
The platform is designed around the philosophy that the tool should get out of the way of the content. You do not need to configure complex project settings; CapCut automatically adapts the project resolution and frame rate to match the first clip you drop onto the timeline. If you need to switch from a 16:9 landscape video for desktop viewing to a 9:16 vertical video for mobile platforms, it is a one-click process that automatically scales and centers your assets.
Where CapCut Desktop Excels: The AI and Automation Tools
If you evaluate CapCut Desktop purely on manual editing tools, it is a decent, middle-of-the-road editor. However, where it commands respect is in its built-in automated workflows. Tasks that take hours of tedious labor in industry-standard NLEs are accomplished in CapCut with a single click.
Industry-Leading Auto-Captions
Generating accurate, styled captions in traditional editors has historically been a headache. While Premiere Pro and DaVinci Resolve have added auto-transcription features, their styling engines remain clunky and slow.
CapCut Desktop’s auto-captioning engine is fast and highly accurate. It processes speech in seconds, automatically dividing the text into readable phrases. The true value lies in the styling presets. With a single click, you can apply dynamic text animations, karaoke-style word highlighting, and modern font templates that automatically scale to fit the screen. If you spot a typo, editing the text in the caption panel updates the timeline instantly without breaking the pacing or layout.
Smart Audio Enhancement and Vocal Isolation
For editors who record voiceovers or interviews in suboptimal environments, audio cleanup is often the most time-consuming phase of post-production.
CapCut’s Enhance Voice tool uses machine learning algorithms to isolate vocals, strip away background room reflections, and level out volume spikes. In my testing, running poorly recorded lavalier mic audio through CapCut’s enhancer produced results comparable to dedicated, expensive audio repair plugins. The program also features an automatic filler-word detector that highlights and deletes “ums,” “ahs,” and long silences across your entire timeline in seconds.
Background Removal and Masking
Rotoscoping—the process of isolating a subject from their background—used to require frame-by-frame masking or complex green screen setups. CapCut’s Auto Cutout tool uses AI to isolate human subjects from any background without a green screen. While it struggles with fine details like frizzy hair or rapid motion, it is more than sufficient for placing text or graphic elements behind a speaker to add depth to your frames.
The Breaking Points: Where the “Professional” Tag Crumbles
Despite its speed, CapCut Desktop is not a magic bullet. When you push the software past standard talking-head videos or quick-cut compilations, you hit several technical limitations. These limitations reveal the boundaries between a high-efficiency layout tool and a true professional NLE.
1. The Keyframing Bottleneck
If your editing workflow relies on complex motion design, custom transitions, or precise spatial animations, CapCut will frustrate you.
While the desktop app has added keyframing capabilities for scale, position, opacity, and audio levels, it lacks a dedicated keyframe graph editor. In Premiere Pro or After Effects, you can adjust the bezier curves of a keyframe to smoothly ease an asset into motion. In CapCut, the interpolation is largely linear. Animations start and stop abruptly, giving them a rigid, robotic feel. There is no way to nest complex groups of layers to animate them as a single object without pre-rendering the clip first.
2. Audio Routing and Mastering Limitations
For complex sound design, CapCut is inadequate. The software lacks:
- Submixes and Audio Busses: You cannot route multiple dialogue tracks to a single audio bus to apply a uniform limiter or compressor.
- VST Plugin Support: Professional editors rely on third-party audio suites (like iZotope RX or FabFilter). CapCut does not support external VST or AU plugins, forcing you to rely solely on its basic built-in equalization and noise reduction controls.
- Precise Metering: There are no peak meters, loudness meters (LUFS), or multi-track mixers. You are essentially mixing by ear and hoping your export levels comply with platform standards.
3. File Management and Storage Bloat
One of the most significant, yet rarely discussed, issues with CapCut Desktop is how it manages system resources and cache files. It quietly stashes tens of gigabytes under C:\Users\<you>\AppData\Local\CapCut\User Data\Cache\—temp media, auto-generated proxies, and pre-rendered effects all pile up there without a word.
Traditional NLEs let you specify exactly where cache, render, and scratch files are stored. By default, CapCut Desktop saves its cache files deep within your system’s primary drive configuration folder. If you edit high-bitrate 4K footage, these hidden cache folders can quickly balloon to hundreds of gigabytes, choking your operating system’s drive.
To keep your machine running smoothly, you must manually dig into the settings panel, locate the cache directory, and purge the files regularly.
4. The Rising Wall of the Pro Subscription
CapCut gained its massive user base by offering incredibly powerful tools for free. However, the monetization model has shifted significantly.
Many features that were previously free—such as specific auto-caption templates, advanced voice isolation, noise reduction, and premium transitions—are now locked behind the CapCut Pro subscription ($19.99/month or $119.99/year).
The software uses a frustrating interface design choice where Pro features are mixed directly alongside free tools, marked only by a small “Pro” tag. If you inadvertently use a single Pro transition or text effect in a two-hour editing session, CapCut will block you from exporting your video until you subscribe or search through your timeline to find and delete the offending element.
Performance Comparison: CapCut vs. DaVinci Resolve vs. Premiere Pro
To provide context on how CapCut handles system resources, here is an overview of how it compares to industry standards when processing standard H.264 and H.265 video codecs:
| Feature/Metric | CapCut Desktop | DaVinci Resolve | Adobe Premiere Pro |
|---|---|---|---|
| System Boot Time | Near Instant | Moderate (Requires Database Load) | Slow (Plugin Scan) |
| Playback Performance | Excellent (highly optimized for H.264/H.265) | Excellent (requires GPU acceleration) | Variable (highly dependent on hardware) |
| Color Grading Control | Basic (LUTs and simple sliders) | Industry Standard (Node-based color wheel) | Advanced (Lumetri Color Panel) |
| Audio Tools | Basic (AI cleaning, no VST support) | Professional (Fairlight DAW integration) | Advanced (Essential Sound & VST support) |
| Subtitle Speed | Instant (Cloud-assisted) | Slow to Moderate | Moderate |
| Collaboration | Cloud Space (limited free tier) | Cloud Project Libraries (multi-user sync) | Frame.io Integration & Team Projects |
How to Build a Hybrid Workflow (Best of Both Worlds)
You do not have to choose between CapCut’s speed and a traditional NLE’s power. The most effective editors utilize a hybrid approach that leverages the strengths of each platform.
Step 1: Pre-Process in Your Primary NLE
Start your project in DaVinci Resolve or Premiere Pro. Use this space to import your multi-cam footage, sync your external audio recorders, perform your main cuts, and apply your base color grade. Because these tools have superior color spaces and multi-track audio synching engines, they remain the best choice for laying down the foundation of your edit.
Step 2: Export a High-Quality Master File
Once your primary edit is locked, export your timeline as a high-bitrate ProRes or DNxHR file. This preserves your color grading data and audio mix without compressing the files into a lossy format.
Step 3: Polish in CapCut Desktop
Import your master file into CapCut Desktop. Use this phase to run the auto-captioning engine, apply dynamic modern text overlays, insert quick trending sound effects, and add vertical framing guides. This allows you to utilize CapCut’s speed for social media optimization without compromising the audio and video quality of your master edit.
Actionable Tips for Optimizing CapCut Desktop
If you decide to integrate CapCut Desktop into your workflow, apply these settings immediately to avoid common technical issues:
- Relocate Your Cache: Go to the top left menu, select
Settings, choose theProjecttab, and change the cache directory to a fast, external SSD. Set the auto-delete cache toggle to 30 days to prevent the application from consuming all of your system drive space. - Enable Proxy Rendering: If you edit on a mid-range laptop, go to settings and turn on proxies. CapCut will automatically generate low-resolution copies of your files for smooth timeline playback and switch back to the original files during final export.
- Utilize Shortcuts: CapCut allows you to switch your keyboard shortcut layout to match Adobe Premiere Pro or Final Cut Pro. If you are migrating from those platforms, changing this setting will eliminate the muscle memory learning curve.
The Verdict: Who is CapCut Desktop For?
If your daily output consists of social media videos, tutorials, review clips, or fast-turnaround content where turnaround time dictates success, CapCut Desktop is an exceptional tool. Its AI captioning, automated audio leveling, and layout templates make it vastly faster for these tasks than traditional software. It is a professional tool built for a modern, speed-first environment.
However, if your work requires complex color grading, multi-camera audio syncing, collaborative workflows, or intricate audio mixing, CapCut is not a replacement for DaVinci Resolve or Premiere Pro. It is a specialized tool best used for specific tasks within a broader editing ecosystem. Understanding where it succeeds and where it fails is the key to shipping better videos, faster.
About the author
The ZQStream Team
Writes long-form essays on Live Streaming Tips, Video Editing Tutorials, Content Creator Gear, Software Tutorials, and Audience Growth Strategies and related topics. Curated by the editorial team behind ZQStream.
Read more
How to Build an Email List for Your Content Brand Now
Loupedeck Live S vs Stream Deck Plus for Video Editing
Keep reading
Related Articles