
Is DaVinci Resolve Worth the Learning Curve for Beginners?
Wondering if DaVinci Resolve is too hard for beginners? Discover the real learning curve, hardware requirements, and how to master it step-by-step.
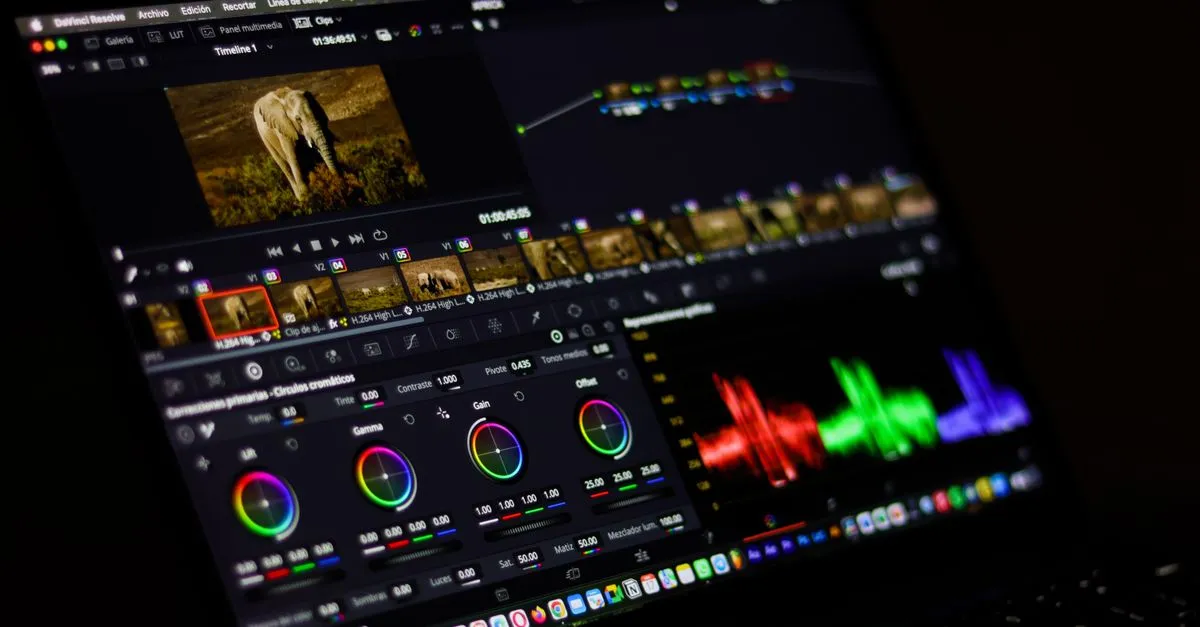
Opening a professional video editor for the first time can feel like sitting in the cockpit of a commercial airliner. There are dials, meters, graphs, and tracks everywhere. Among all the editing programs available today, DaVinci Resolve has a reputation for being one of the most intimidating.
You might have heard that it is the software used to color-grade Hollywood films, which sounds exciting. But you might also have heard that its node-based system is confusing, its hardware requirements are steep, and its learning curve is steep enough to make beginners run back to simpler, template-based apps.
So, is DaVinci Resolve actually worth the time and effort it takes to learn? Or should you save yourself the headache and stick to something simpler?
Here is a practical, jargon-free breakdown of what you can expect when starting with DaVinci Resolve, how to bypass the most common frustrations, and whether it makes sense for your specific editing goals.
Why DaVinci Resolve Feels So Intimidating to Beginners
Most video editors fail when they first open DaVinci Resolve because they try to understand the entire program at once. To understand why this happens, you have to look at how the software is built.
Unlike basic editing tools that keep everything in a single workspace, Resolve is divided into seven distinct sections, which they call Pages. You navigate between them using a row of buttons at the bottom of the screen:
- Media: Where you import and organize your raw footage.
- Cut: A fast, simplified timeline designed for quick edits, rough cuts, and tight deadlines.
- Edit: The traditional, full-featured timeline where you do most of your storytelling, pacing, and basic transitions.
- Fusion: A built-in 3D visual effects and motion graphics engine (similar to Adobe After Effects).
- Color: The industry-standard color grading workspace.
- Fairlight: A complete digital audio workstation (DAW) for sound design, mixing, and voiceover recording.
- Deliver: The export window where you choose your render settings and upload your final video.
When you look at it this way, DaVinci Resolve isn’t just one software program; it is five or six professional-grade applications merged into one interface.
The classic beginner mistake is trying to learn all seven pages in your first week. If you try to jump from importing footage directly into complex 3D text tracking in Fusion, you will get frustrated, experience crashes, and likely quit.
The Node System: The Biggest Mental Hurdle
If you have ever used Photoshop, Premiere Pro, or CapCut, you are probably familiar with Layers. In a layer-based system, you stack effects, adjustment layers, and text boxes on top of each other. The program reads the stack from top to bottom.
DaVinci Resolve does not use layers for its advanced color grading and visual effects. Instead, it uses Nodes.
Think of nodes as an assembly line or a chain of filters.
- Your raw video footage enters the first node.
- You apply a specific change (like adjusting the exposure) in that node.
- The modified video flows out of that node and into the next one, where you might apply a color grade.
- The video flows out of that node to the final output.
Instead of stacking things vertically, you connect them horizontally with lines. For a beginner, this looks like a complex circuit board or a mind map.
While nodes look terrifying at first glance, they are actually far more organized than layers once you get the hang of them. With layers, if you want to change an effect you applied five steps ago, you have to dig through a messy stack of adjustment layers. With nodes, you simply look at the chain, find the specific box labeled “Contrast,” and adjust it without affecting anything else.
The Value Proposition: Free vs. Paid Studio Version
One of the biggest reasons to push through the learning curve of DaVinci Resolve is the cost.
Many professional editing suites force you into a monthly subscription model. You pay every single month, forever, just to access your own project files. If you stop paying, your access is cut off.
Blackmagic Design (the creators of DaVinci Resolve) takes a completely different approach. They offer two versions:
The Free Version (DaVinci Resolve)
This is not a trial version that puts watermarks on your videos or limits your export length. It is a fully functional, highly capable editor. For about 90% of users, the free version has everything they will ever need. You can edit in 4K, color grade, design audio, and export to social platforms without paying a single dollar.
The Paid Version (DaVinci Resolve Studio)
For a one-time purchase of $295, you unlock the Studio version. This gives you lifetime updates (you never pay for new versions when they come out), advanced noise reduction, AI-powered tools (like automatic voice isolation and depth maps), and faster exporting using hardware acceleration.
When you compare this one-time purchase to the ongoing cost of monthly software subscriptions, the financial benefit of learning Resolve becomes obvious.
The Hidden Obstacle: The Hardware Trap
Many beginners blame their frustration on the software when their computer is the actual bottleneck. Because DaVinci Resolve is a professional application, it demands significant system resources—specifically your Graphics Processing Unit (GPU).
If you try to run Resolve on an older laptop with integrated graphics and only 8GB of RAM, you will experience lag, stuttering playback, and random crashes. This can make the software feel broken or unusable.
To run the software comfortably, you should ideally have:
- Processor (CPU): Intel Core i7 / AMD Ryzen 7, or an Apple Silicon chip (M1, M2, M3).
- Memory (RAM): 16GB is the bare minimum; 32GB is recommended if you plan to use Fusion or work with high-resolution footage.
- Graphics (GPU): A dedicated graphics card with at least 4GB of VRAM (Nvidia or AMD).
- Storage: A Solid State Drive (SSD) for your footage. Trying to edit off an old spinning external hard drive will result in constant playback lag.
If your computer doesn’t meet these specs, you don’t necessarily have to give up. Resolve has excellent built-in tools to help lower-end computers run smoother, such as Proxies (which temporarily replace your heavy video files with smaller, easier-to-read versions while editing) and Timeline Proxy Resolution (which lowers the playback quality of your viewer window so your computer doesn’t have to work as hard).
How to Learn Resolve Without the Meltdown: A 4-Step Roadmap
If you want to learn DaVinci Resolve without burning out, you need a structured approach. Do not start by trying to make a cinematic masterpiece. Instead, follow this step-by-step roadmap to build your confidence.
Step 1: Ignore 80% of the Program
When you open a new project, ignore the Cut, Fusion, Color, and Fairlight pages. Go straight to the Edit page.
The Edit page works just like any other standard video editor. You drag your footage into the timeline, use the blade tool to cut out mistakes, stack B-roll on top, and add simple text. Focus on editing a simple, complete video using only this page. Do this for your first three or four projects.
Step 2: Use the Official Training
Instead of searching for random, unstructured YouTube tutorials that might be outdated or too advanced, go directly to the source. Blackmagic Design offers free, high-quality training books and video courses on their official website. They even provide free project files you can download so you can follow along with the instructor step-by-step.
Step 3: Add One New Page at a Time
Once you can comfortably edit a video on the Edit page, pick one new area to learn.
- Want to clean up your background noise? Spend a week learning the basics of the Fairlight page.
- Want to make your colors pop? Spend a week learning the basic primary wheels on the Color page.
- Avoid the Fusion page until you absolutely need custom motion graphics or advanced green-screen keying.
Step 4: Learn Keyboard Shortcuts Early
Because Resolve has so many functions, clicking around the screen with your mouse is slow and tedious. Taking twenty minutes to learn basic shortcuts—like B for blade, A for the pointer, and Spacebar for play/pause—will make the editing process feel significantly more responsive and less frustrating.
Who is DaVinci Resolve For?
To decide if the learning curve is worth it, you have to look at what you want to achieve with your videos.
You should learn DaVinci Resolve if:
- You want to upgrade your production value: If you want your videos to look like movies, have clean audio mix, and feature professional color grading, Resolve is the best place to do it.
- You want to save money long-term: If you are tired of paying monthly software fees and want a professional tool that is free (or a one-time purchase), Resolve is unmatched.
- You want to future-proof your skills: The skills you learn in Resolve are highly transferable. If you ever want to work in post-production, knowing Resolve is a major asset on your resume.
You should probably avoid DaVinci Resolve if:
- You only edit simple, vertical social media clips: If your content consists of quick talking-head videos for TikTok or Reels with automated captions, using Resolve is like driving a semi-truck to the grocery store. Simpler tools like CapCut or Premiere Rush will be much faster and easier.
- You have a low-spec computer: If you are editing on a basic school or office laptop and cannot afford to upgrade your hardware, Resolve will likely be too heavy for your system.
- You want instant results with zero study: If you don’t have the patience to sit through a few basic tutorials and learn how to use a timeline, you will likely find Resolve’s professional layout frustrating.
The Verdict
Is DaVinci Resolve worth the learning curve for beginners? Yes, absolutely—with one condition: you must approach it step-by-step.
If you try to master the entire program in one weekend, you will likely get overwhelmed and give up. But if you start by using only the Edit page, utilize the official training guides, and slowly add color and audio tools as you need them, you will find that the software is surprisingly logical.
The time you invest in learning DaVinci Resolve pays off in creative freedom, professional-grade tools, and the liberation from monthly software subscriptions. It is a program that grows with you; as your editing skills improve, you will never have to worry about outgrowing your software.
About the author
Admin
Writes long-form essays on Live Streaming Tips, Video Editing Tutorials, Content Creator Gear, Software Tutorials, and Audience Growth Strategies and related topics. Curated by the editorial team behind ZQStream.
Read more
Is a Cloudlifter Needed for Shure SM7B? Outdated Gear Advice

How to Build an Email List for Your Content Brand Now
Keep reading
Related Articles